Macrame wall hangings are a beautiful and trendy way to add a cozy, boho touch to your home decor. They are surprisingly simple to make with just a few materials and basic knotting techniques. Follow this step-by-step guide to create your own stunning wall art.
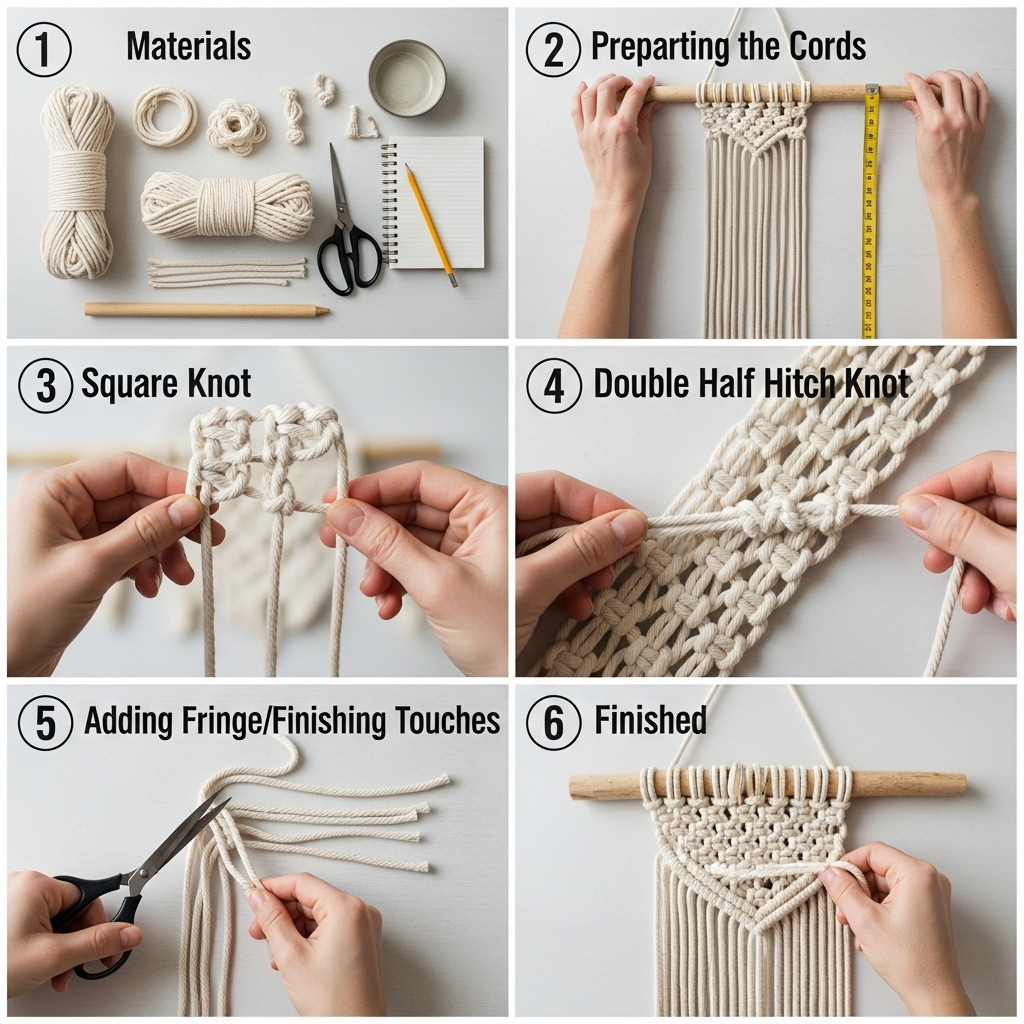
Materials Needed:
- Macrame cord or thick cotton rope
- Wooden dowel or branch for hanging
- Scissors
- Measuring tape
Step 1: Prepare Your Materials
Cut multiple lengths of macrame cord to your desired length. The length depends on how large you want your wall hanging to be, but a good starting point is about 3-4 feet per cord.
Step 2: Attach Cords to the Dowel
Fold each cord in half and use a Lark’s Head Knot to attach it to the wooden dowel or branch. This creates the base for your macrame design.
Step 3: Learn Basic Knots
The most common knots used in macrame are the Square Knot and the Half Hitch Knot. Practice these knots before starting your pattern.
Step 4: Start Knotting Your Design
Using the basic knots, start creating your pattern. You can make rows of square knots or alternating knots for texture and style.
Step 5: Trim and Finish
Once you reach the desired length and design, trim the ends of the cords to your liking. You can leave them straight or create a V-shape or angled cut for added flair.
Step 6: Hang Your Art
Tie a piece of cord to each end of the dowel for hanging. Find the perfect spot on your wall and enjoy your handmade macrame wall hanging!